> ## Documentation Index
> Fetch the complete documentation index at: https://spyro.app/docs/llms.txt
> Use this file to discover all available pages before exploring further.
# Workspace settings
> The everyday settings for your website in Spyro - your profile, the workspace name and time zone, who the writer should target, the competitors you track, the pages Spyro has looked at, and API keys.
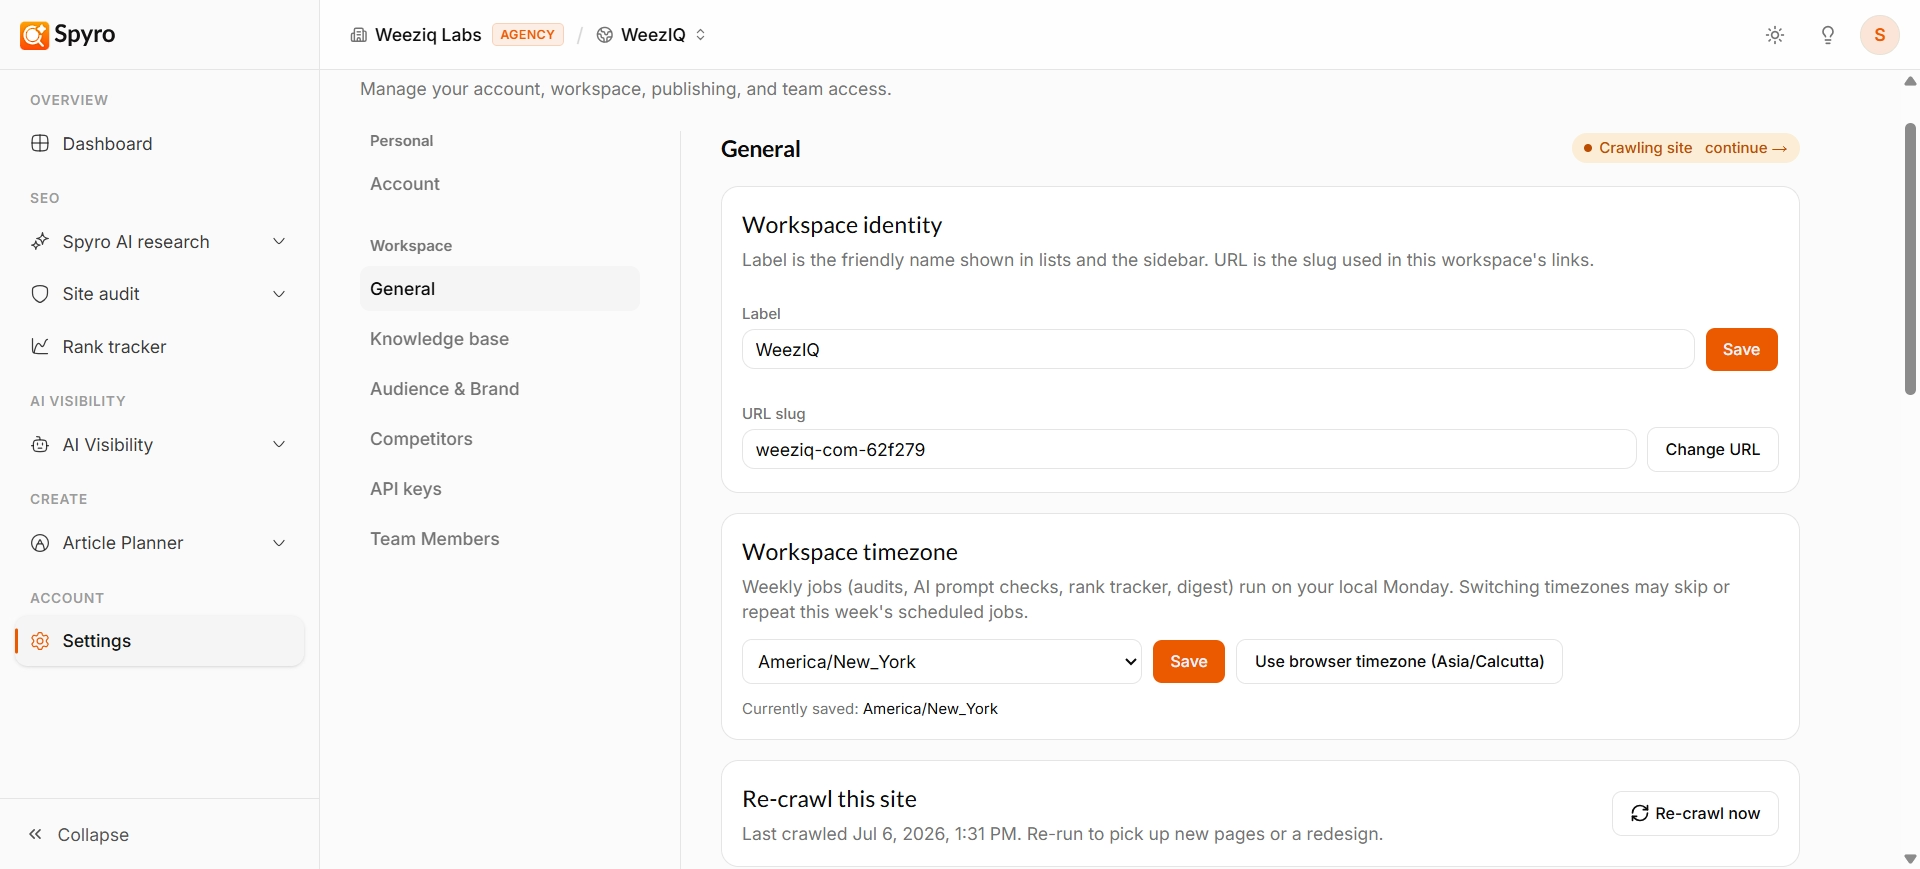 **Settings** is where you fine-tune one website in Spyro. It's your control panel for the small things that make everything else work better - your name and time zone, who you sell to, the rivals you watch, and the pages Spyro has read.
Open it from **Settings** in the sidebar. The options below sit along the top of the page as tabs.
## Why use it
A few minutes here pays off everywhere. When Spyro knows your time zone, your audience, and your competitors, your reports land at the right time and your articles sound right for the people you're trying to reach.
## Your account
This is a quick summary of *you* in this workspace - the email you signed in with and your role on the site. Spyro uses Google sign-in, so you change your name, password, and security over at [myaccount.google.com](https://myaccount.google.com/).
## Workspace name and time zone
Give the site a clear label so it's easy to spot when you switch between websites.
This keeps your schedules and reports on local time - rank checks, AI checks, and your content calendar all follow it.
Use **Re-crawl** to have Spyro read your latest pages again, so your scores and suggestions stay up to date.
## The audience your writer targets
Tell Spyro who you're writing for, and every article gets sharper.
* **Audience segments** - short tags for the people you sell to. Spyro fills these in from your site, and you can edit, remove, or add your own.
* **Business description** - a short paragraph on what you do, who you serve, and what makes you different.
This is the single fastest way to improve the articles Spyro writes. The more honest detail you give, the more on-target the drafts feel.
## The competitors you track
Spyro lists the rival websites it thinks you compete with, and shows how many keywords you share with each. You can **add** a competitor you want to watch or **remove** ones that don't matter. Keep the list to the rivals that really count - these feed your [AI visibility](/docs/product/ai-visibility) comparison and your [rank tracker](/docs/product/rank-tracker).
## Pages Spyro has looked at
This is the list of every page Spyro found when it read your site. For each one you see its address, its **SEO** and **GEO** scores, and its worst issue. Click a row to open that page's audit report. A bar at the top shows how much of your site Spyro has read so far.
### Add pages yourself
Spyro doesn't always find every page. To add more, paste in your page addresses (one per line, up to 10 at a time). Spyro reads and scores each one right away. Anything that isn't on your site, or is blocked from being read, is skipped and reported back to you.
If you haven't run an audit yet, this tab will invite you to run your first [site audit](/docs/product/audit) - that's the scan that fills the page list.
## API keys
An **API key** is a secret code that lets another tool connect to Spyro on your behalf - think of it like a password just for software. **Most people never need one.** If you do connect another tool, you can:
Give it a name so you can tell your connections apart. You can keep up to 3 at a time.
Paste the key into the other tool you're connecting.
Delete a key any time to cut off access instantly.
Treat each key like a password - anyone who has it can act on your website. Only workspace admins can create or delete keys.
## Related
**Settings** is where you fine-tune one website in Spyro. It's your control panel for the small things that make everything else work better - your name and time zone, who you sell to, the rivals you watch, and the pages Spyro has read.
Open it from **Settings** in the sidebar. The options below sit along the top of the page as tabs.
## Why use it
A few minutes here pays off everywhere. When Spyro knows your time zone, your audience, and your competitors, your reports land at the right time and your articles sound right for the people you're trying to reach.
## Your account
This is a quick summary of *you* in this workspace - the email you signed in with and your role on the site. Spyro uses Google sign-in, so you change your name, password, and security over at [myaccount.google.com](https://myaccount.google.com/).
## Workspace name and time zone
Give the site a clear label so it's easy to spot when you switch between websites.
This keeps your schedules and reports on local time - rank checks, AI checks, and your content calendar all follow it.
Use **Re-crawl** to have Spyro read your latest pages again, so your scores and suggestions stay up to date.
## The audience your writer targets
Tell Spyro who you're writing for, and every article gets sharper.
* **Audience segments** - short tags for the people you sell to. Spyro fills these in from your site, and you can edit, remove, or add your own.
* **Business description** - a short paragraph on what you do, who you serve, and what makes you different.
This is the single fastest way to improve the articles Spyro writes. The more honest detail you give, the more on-target the drafts feel.
## The competitors you track
Spyro lists the rival websites it thinks you compete with, and shows how many keywords you share with each. You can **add** a competitor you want to watch or **remove** ones that don't matter. Keep the list to the rivals that really count - these feed your [AI visibility](/docs/product/ai-visibility) comparison and your [rank tracker](/docs/product/rank-tracker).
## Pages Spyro has looked at
This is the list of every page Spyro found when it read your site. For each one you see its address, its **SEO** and **GEO** scores, and its worst issue. Click a row to open that page's audit report. A bar at the top shows how much of your site Spyro has read so far.
### Add pages yourself
Spyro doesn't always find every page. To add more, paste in your page addresses (one per line, up to 10 at a time). Spyro reads and scores each one right away. Anything that isn't on your site, or is blocked from being read, is skipped and reported back to you.
If you haven't run an audit yet, this tab will invite you to run your first [site audit](/docs/product/audit) - that's the scan that fills the page list.
## API keys
An **API key** is a secret code that lets another tool connect to Spyro on your behalf - think of it like a password just for software. **Most people never need one.** If you do connect another tool, you can:
Give it a name so you can tell your connections apart. You can keep up to 3 at a time.
Paste the key into the other tool you're connecting.
Delete a key any time to cut off access instantly.
Treat each key like a password - anyone who has it can act on your website. Only workspace admins can create or delete keys.
## Related